HUB 06 · Guides
How to Install a Smart Lock: Full Replacement and Retrofit
About thirty minutes with a Phillips screwdriver, plus the ten-minute strike alignment check that decides whether it still works next winter.
We earn a commission if you buy through our links. It does not change the price you pay, and it does not decide our picks — our selection criteria are published in full. How this works.
How do you install a smart lock?
A full deadbolt replacement is four screws out, four screws in, and about thirty minutes with a Phillips screwdriver. A retrofit is closer to ten. Both need one step almost every guide omits: check and correct strike alignment first, because a misaligned strike is what makes a new lock jam.
Before you start: confirm the lock physically fits. Backset, cross-bore, edge bore and door thickness are the four numbers, and the door measurement guide walks through all of them. Discovering a 1-1/2 in bore with the old lock already off the door is a bad afternoon.
Tools
Almost nothing. A #2 Phillips screwdriver does the entire job on both install types, and a manual driver is better than a power one because it is much harder to overtighten and crack an escutcheon. Add a tape measure for the fit check, a pencil for marking strike positions, and 3 in wood screws for the strike plate upgrade described below. If the strike needs adjusting you will also want a sharp 1/2 in chisel and, for a shallow pocket, a drill with a 1 in spade bit.
What you do not need for a standard install: a drill for the lock itself, a hole saw, or a jig. If the instructions for your model call for drilling the door, you are either fitting a lock to an undrilled slab or fitting one that does not match your bore, and both are a different job.
Part A: replacing a full deadbolt
- Unpack and sort. Lay out the exterior escutcheon, interior escutcheon, bolt assembly, strike plate, screws and battery pack. Find the printed manual and keep it open. Do not install batteries yet.
- Remove the old interior escutcheon. Two screws, usually vertical. The interior half lifts away and the exterior half comes off with it or immediately after.
- Remove the old bolt. Two screws in the faceplate on the door edge. Slide the bolt assembly out of the edge bore. Keep every original part in a bag; if you rent, you are reinstalling all of it later.
- Clean the bores. Wipe out sawdust and old grease. If paint has built up in the edge-bore mortise, pare it back to clean wood with a chisel now, while there is nothing in the way.
- Set the backset on the new bolt. This is the step that gets skipped. The new bolt assembly is adjustable between 2-3/8 in and 2-3/4 in; the manual shows which position is which, usually a collar you extend or a cam you rotate. Set it to match the number you measured, then slide it into the edge bore.
- Check bolt orientation.The bolt has an up. Most have an arrow or the word TOP stamped on the assembly, and the tailpiece slot must be horizontal (or whatever the manual specifies) when the bolt is retracted. Getting this wrong means the lock reads “locked” when the bolt is out and “unlocked” when it is in.
- Fix the faceplate. Two screws, snug not tight. The faceplate should sit flush with the door edge, not proud. If it stands proud, the mortise is too shallow and needs a few passes with a chisel.
- Fit the exterior half. Feed the cable (on locks with a keypad outside) and the tailpiece through the cross-bore and hold the exterior escutcheon square against the door. On most models a small mounting plate goes on the inside first.
- Fit the interior half. Route the cable so it is not pinched between the escutcheon and the door — a pinched ribbon cable is a common cause of a keypad that works for a week. Engage the tailpiece into the interior mechanism, then start both through-bolts by hand before tightening either.
- Tighten evenly, alternating. Snug one, then the other, then back to the first. Overtightening one side skews the mechanism and causes binding.
- Test by hand, door open. Batteries still out. Turn the thumbturn and watch the bolt extend and retract. It must move freely with no resistance. If it does not, something is misaligned inside and no amount of motor will fix it.
- Deal with the strike. Do this before batteries. Part C below.
- Batteries, then calibration. Fit the cells, then run whatever calibration or auto-alignment routine the manual describes. Most locks learn the travel of your specific bolt during this, which is why doing it before the strike is correct produces a lock that has learned a bad door.
- Set up codes and the app last.Change the default master code. Enroll a code for every household member rather than sharing one, so a departure means deleting one code rather than changing everybody's.
Part B: fitting a retrofit
A retrofit lock — the August Wi-Fi Smart Lock, the SwitchBot Lock Ultra, the Yale Approach — replaces nothing. It mounts to the inside face of the door over your existing thumbturn and turns it with a motor. The exterior of the door and your keys are untouched, which is why these are the answer for rented doors and for doors whose measurements came back non-standard. The full field is in our no-drilling roundup.
- Test the existing deadbolt by hand first.Not optional. Open the door, turn the thumbturn, and feel the resistance. Then close the door and turn it again. If the closed-door turn is noticeably harder, stop and fix the strike (Part C). A retrofit motor inherits every mechanical problem the bolt already has — the SwitchBot Lock Ultra's own guidance says a stiff deadbolt will jam it, drain the battery and report failures.
- Check clearance. Hold the unit against the thumbturn and confirm it does not foul the door edge, the architrave, a narrow stile, or a storm door behind the opening. Retrofit bodies are bulky and this is the most common physical failure.
- Fit the mounting plate. Most kits offer two routes: adhesive, or replacing the two interior escutcheon screws with the supplied longer ones. The screw route is more reliable and just as reversible — you are reusing existing holes, not drilling. Use adhesive only if the interior plate geometry rules out the screws.
- Fit the thumbturn adapter.Kits ship several sizes to grip different thumbturn shapes. Choose the one that grips with no slop at all; a loose adapter is what produces “it turns but the bolt does not move.”
- Mount the body and calibrate.Clip the unit onto the plate and run the app's calibration, which teaches it the locked and unlocked positions of your specific thumbturn. Do this with the door closed, so it learns the real travel.
- Cycle it ten times. Lock and unlock repeatedly and listen. A consistent sound each cycle is what you want. Any cycle that sounds like it is straining means the underlying bolt is fighting the strike.
- Add the hub or keypad if you bought one.Remote access on a Bluetooth retrofit needs the manufacturer's hub; code entry needs their keypad. Both are separate purchases and both are hardware, not subscriptions.
Part C: strike alignment — the step everyone skips
If you read one section of this page, read this one. The overwhelming majority of “my smart lock jams,” “the motor grinds,” and “it eats batteries” complaints are a strike plate that is a few millimeters out of position. A human hand compensates for that without noticing, by lifting the handle or leaning on the door. A motor cannot lean on anything. It just pushes until it stalls, logs a failure, and tries again.
Diagnosing it
- Door open, throw the bolt by hand. It should extend its full travel — about 1 in on a residential deadbolt — with light, even resistance.
- Door closed, throw it again. Any additional resistance is misalignment. If you have to lift, push or pull the door to get it to throw, the strike is wrong.
- Find out which way. Color the tip and sides of the bolt with a pencil or a marker, close the door, and throw the bolt until it stops. Open up and look at the strike plate: the mark shows exactly where the bolt is hitting — high, low, or on the near edge.
- Check the pocket depth. Poke a pencil into the hole behind the strike plate. The bolt needs at least a full 1 in of clear depth. Builders routinely leave a shallow pocket, and paint fills what is left.
Correcting it
If the bolt is hitting the plate high or low, the usual cause is hinge sag and the usual fix is at the hinges rather than the strike: replace the middle screw of the top hinge with a 3 in screw that reaches the framing, and drive it home. This pulls the top of the door back toward the hinge jamb and lifts the latch edge, often by exactly the amount needed.
If the bolt is hitting the near edge of the plate, the door is not closing far enough, usually because of compressed or overthick weatherstripping. Adjust the stop or the weatherstrip rather than moving the strike.
If the plate itself is in the wrong place, remove it, enlarge the pocket in the needed direction with a chisel, plug the old screw holes with glued dowel or matchsticks so new screws bite into solid material, and refit. Never rely on screws re-driven into their own worn holes; they will drift back.
The 3 in screw upgrade
While the strike plate is off, replace its screws with 3 in wood screws that pass through the jamb and into the framing stud behind it, and fit a strike box if the kit includes one. This costs a few dollars and does two useful things at once: it anchors the strike into structure rather than into a strip of trim, and it holds alignment as the frame moves with the seasons. It is the single highest-value change you can make to any door, and it is described in more detail in our threat model guide.
Part D: the first-run setup nobody documents
The hardware is on the door and the bolt throws cleanly. You are about two thirds done, because the settings you choose in the next ten minutes are what decide whether the lock is pleasant to live with or quietly annoying for years. Work through these in order.
1. Calibrate the bolt travel
Most motorized locks learn the travel between fully retracted and fully extended on first setup, and they learn it from whatever the door was doing at that moment. Calibrate with the door closed and latched, not standing open. A lock calibrated against an open door learns a travel that does not match the strike, then reports a jam every time the door is actually shut.
2. Set the codes before you set the automations
Give every person their own code rather than sharing one. It costs nothing, and it is the difference between revoking a dog walker and changing the code for the whole household. Avoid the obvious sets — the house number, a birth year, four repeated digits — and if the lock supports a scramble or anti-peek entry mode, turn it on now while you are still in the settings.
3. Decide about auto-lock deliberately
Auto-lock is the feature most likely to be switched on by default and most likely to cause the first bad experience. It is excellent on a door that reliably closes and poor on one that does not, because a bolt that throws into fresh air reports locked while securing nothing. If the door has a closer, turn it on. If people prop it, leave it off or set the longest available delay. Then test it once, deliberately, from outside.
4. Update the firmware while you are standing there
Do it now, at the door, with the app connected and the batteries fresh — not in six months from another room. A firmware update that fails partway because the lock dropped off Bluetooth halfway down the hall is the worst version of this task.
5. Find the emergency power path and try it
Every keyless lock has one: a 9V contact on the exterior escutcheon, a USB-C port, or a physical key. Locate it, confirm you can reach it from outside, and if it is a key, put that key somewhere that is not inside the house. Do this on installation day. The day you need it is not the day to discover the contact is under a cover you need a screwdriver for.
6. Test the whole thing from outside, once
Close the door. Lock it. Then enter with each method you configured — code, fingerprint, app, key — in turn. Five minutes, and it catches the two most common installation faults: a tailpiece seated one spline out, and a strike that only aligns when the door is pulled toward you.
Write down what the lock is. Model, the app it uses, where the emergency contact is, and where the physical key lives. Put it wherever your household keeps that sort of thing. In three years, when the batteries die at an inconvenient moment, whoever is home will not be the person who installed it.
“It jams intermittently” — what that almost always means
Intermittent is the diagnostic clue. A lock that fails consistently is misassembled. A lock that fails sometimes is fighting something that changes, and in a door only a few things change.
- Seasonal movement. Wood doors and frames swell in humidity and shrink in dry cold. A strike that is marginal in July is out of tolerance in January. If your lock became unreliable at a change of season, this is the answer, and the fix is realignment plus long screws, not a new lock.
- Falling battery voltage. Motors lose torque as cells deplete long before the app reports a low battery. A lock that has been fine for six months and now fails one cycle in five is telling you the battery reserve no longer covers a marginal strike. Fresh cells will mask it for a while; the strike is still wrong.
- Hinge sag. Progressive rather than seasonal. The bolt starts hitting slightly lower on the plate over months. The top-hinge long-screw fix addresses it.
- Door not fully closed. On doors with stiff weatherstripping the door can rest a couple of millimeters proud unless pushed. Auto-lock then fires against a bolt that cannot reach its pocket. A door position sensor is a cheap way to know this is happening rather than guessing; the door and window sensors we cover report open, closed and left-ajar states.
- A retrofit adapter that has loosened. On retrofits only: re-seat the thumbturn adapter and re-run calibration.
Notice what is not on that list: the motor. Motor failure in these locks is rare, and almost every unit returned as faulty was fighting a door. Correcting the strike takes twenty minutes and is the difference between a lock that works for five years and one that gets returned in three months.
If you are still choosing hardware, the best smart locks roundupranks the field and states each pick's install type, and our methodology explains how those judgments were compiled from manufacturer manuals rather than from a bench. More explainers are on the guides hub.
The hardware
The hardware this guide is about
The products this guide refers to, with prices pulled live from Amazon and dated on every card. Full rankings live in the roundups linked above.
Best overall smart lock
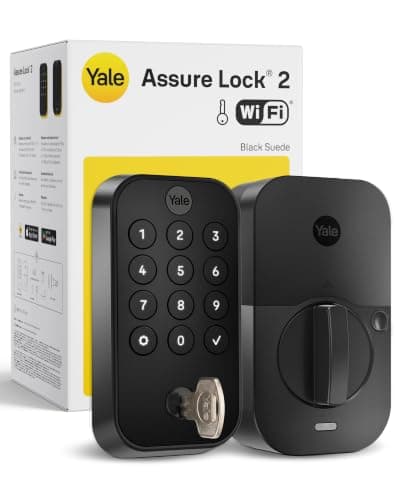
Yale Assure Lock 2 (Wi-Fi, keyed)
The modular one. Yale sells the same lock body in keyed and key-free, touchscreen and keypad, with the radio as a swappable module — so you buy the connectivity you want instead of the connectivity that shipped.
- ProductNo image
Best no-drill retrofit
SwitchBot Lock Ultra Touch Combo (with Hub Mini)
The credible way to make a rented door smart without drilling a hole. It mounts over the existing thumbturn, keeps your key, and this bundle puts the fingerprint keypad and the hub in the same box — so codes and remote access both work the day it arrives.
Best for renters
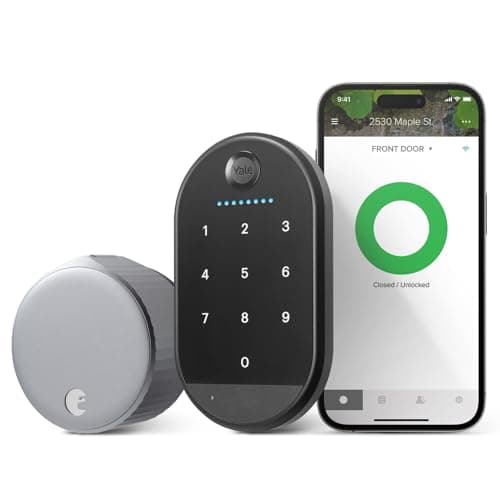
August Wi-Fi Smart Lock (with Yale Keypad)
The retrofit that started the category. It clamps onto the inside of your existing deadbolt and turns the thumbturn — the outside of the door does not change at all, which is why it is the default answer for renters. The listing we link is the bundle, so the Yale Keypad that gives it code entry is in the same box.
#ad · As an Amazon Associate we earn from qualifying purchases.
Questions
Frequently asked
How long does it take to install a smart lock?
Do I need to drill my door to fit a smart lock?
Why does my new smart lock grind or stall?
Can I install a smart lock myself as a renter?
Should I install batteries before or after checking the strike?
Keep reading
Related
- Retrofit vs replacement locksWhether to swap the whole deadbolt or motorize the one you own.
- Will a smart lock fit my door?Measure the five numbers before you order anything.
- Best no-drilling smart locks for rentersRetrofits that install in ten minutes and reverse just as fast.
- Best smart deadboltsFull replacements, ranked.
- Are smart locks safe?Why the strike screws matter more than the lock body.
Receipts
Sources
- Yale Home — Assure Lock 2 installation documentation
- Schlage — installation instructions and strike plate guidance
- August — retrofit mounting and calibration guides
- SwitchBot — Lock Ultra mounting, adapters and calibration
- Kwikset — deadbolt installation and adjustment documentation
- BHMA — ANSI/BHMA standards for deadbolt bolt projection and strike reinforcement
We do not run a testing lab and we do not pretend to. Specifications come from the manufacturer's own published documents and from published standards; prices come from the live Amazon API. Where a figure is not published, the page says “not published” rather than guessing. Read the full method.